Watch YouTube videos frame by frame with these keyboard shortcuts
There are many reasons why you might want to go through a video frame by frame, such as reading text on the screen that was only visible for a few milliseconds or taking a screenshot for your next YouTube upload.
This article explains how to go frame by frame in two ways, on YouTube itself and locally by downloading any YouTube video and then going frame by frame in one of the top four most popular video editing tools.
I will also show you how to save specific video frames on each platform so that you can use or edit the frame later to create your attention-grabbing YouTube thumbnail.
Frame by frame via the YouTube Player
Visit any YouTube video of your choice in your web browser.
You can test all the keyboard shortcuts with my YouTube channel trailer video here:
Press the play button, so YouTube begins loading the video content. Alternatively, click anywhere on the timeline, then hit play. You can also use any of the following keyboard shortcuts to play or pause the video.
- Spacebar
- Play/Pause Media Key
- K

The idea is to get the timeline close to where you want to go through your video frame by frame.
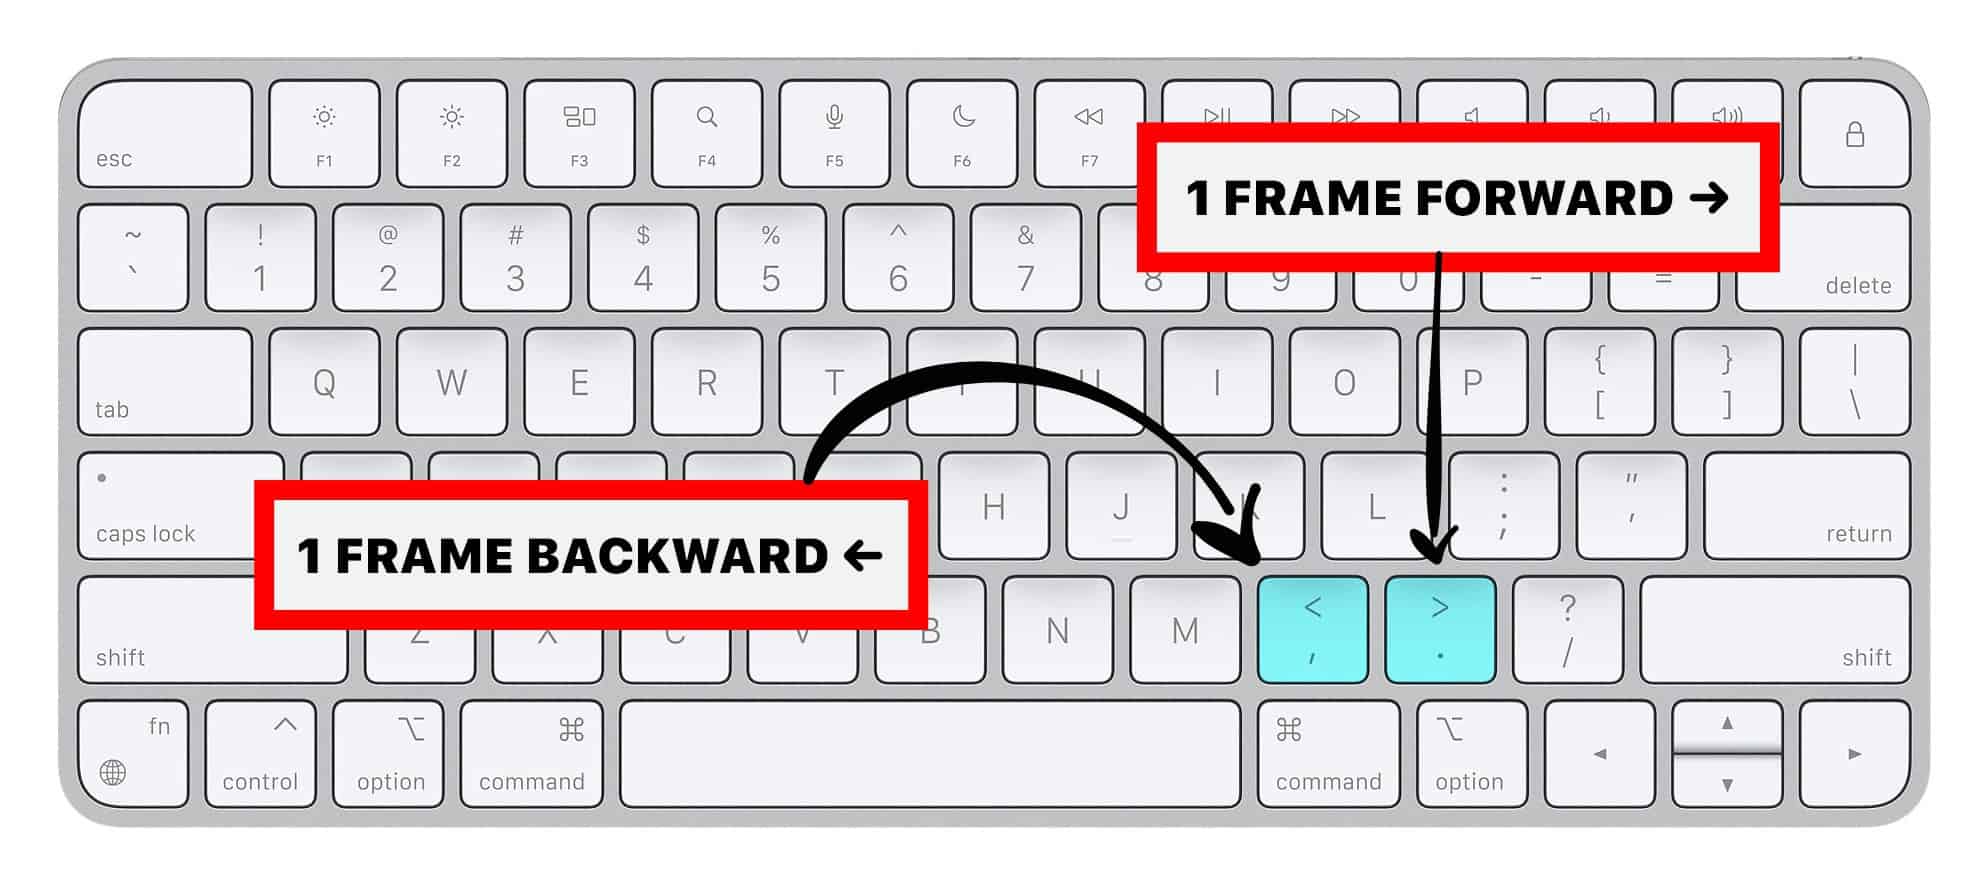
Once you find a good spot, pause the video. Press the comma key to move one frame backward on YouTube. Press the dot key to move one frame forward on YouTube.
- Comma , moves the playhead one frame backward.
- Dot . moves the playhead one frame forward.
How to download a video frame on YouTube
Let me show you how you can save the frame of your choice.
First, follow the steps above to find a video frame of your choice on any YouTube video.
By default, YouTube will always display all interface elements, such as playback control elements, video titles, etc., when the video is paused.
We don't want that, so let's turn it off.
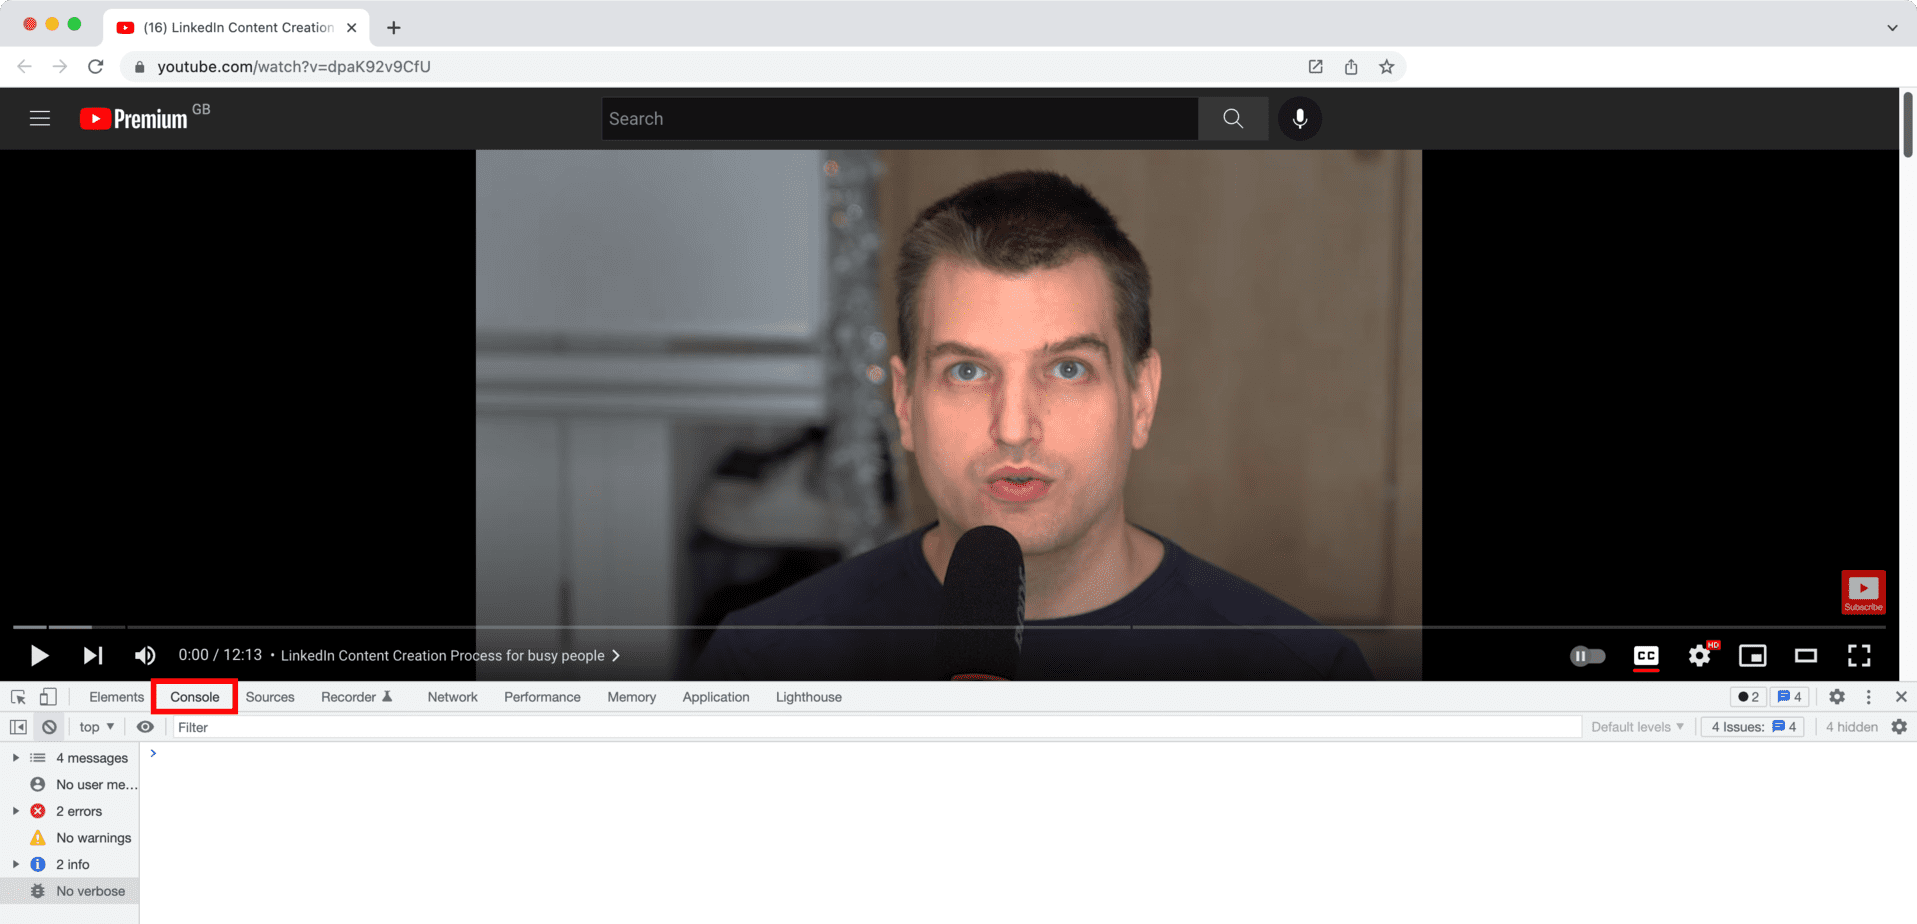
Open your web browser's JavaScript console. This is slightly different for each browser.
- Firefox: Menu Bar > Tools > Web Developer > Web Console
- Chrome: View> Developer>Developer Tools
- Safari: Safari Menu > Preferences > Advanced > Checkbox "Show Develop Menu" > Develop Menu > Show Error Console
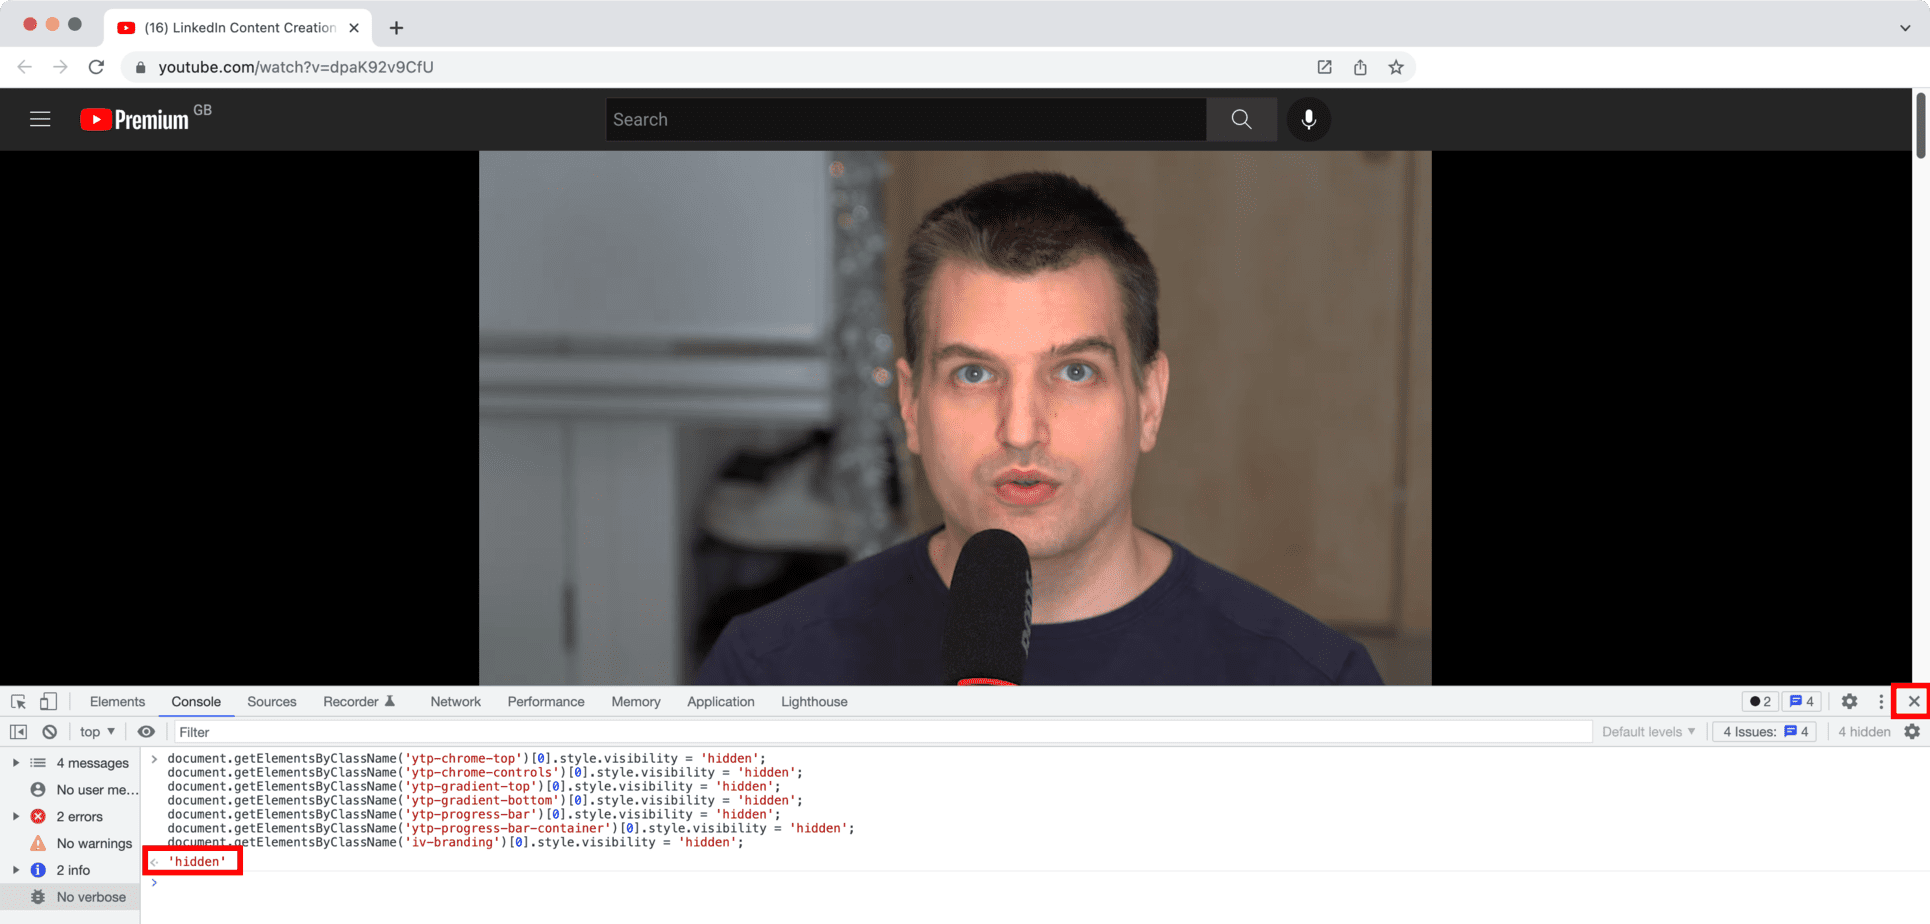
It should look like this. Notice how the playback elements are still visible.
Next, copy and paste the following code into the console next to the > prompt and press enter. This Javascript code hides each YouTube video interface individually and allows you to take pretty screenshots.
document.getElementsByClassName('ytp-chrome-top')[0].style.visibility = 'hidden';
document.getElementsByClassName('ytp-chrome-controls')[0].style.visibility = 'hidden';
document.getElementsByClassName('ytp-gradient-top')[0].style.visibility = 'hidden';
document.getElementsByClassName('ytp-gradient-bottom')[0].style.visibility = 'hidden';
document.getElementsByClassName('ytp-progress-bar')[0].style.visibility = 'hidden';
document.getElementsByClassName('ytp-progress-bar-container')[0].style.visibility = 'hidden';
document.getElementsByClassName('iv-branding')[0].style.visibility = 'hidden';
Next, close the JavaScript console by pressing the X icon at the top right.
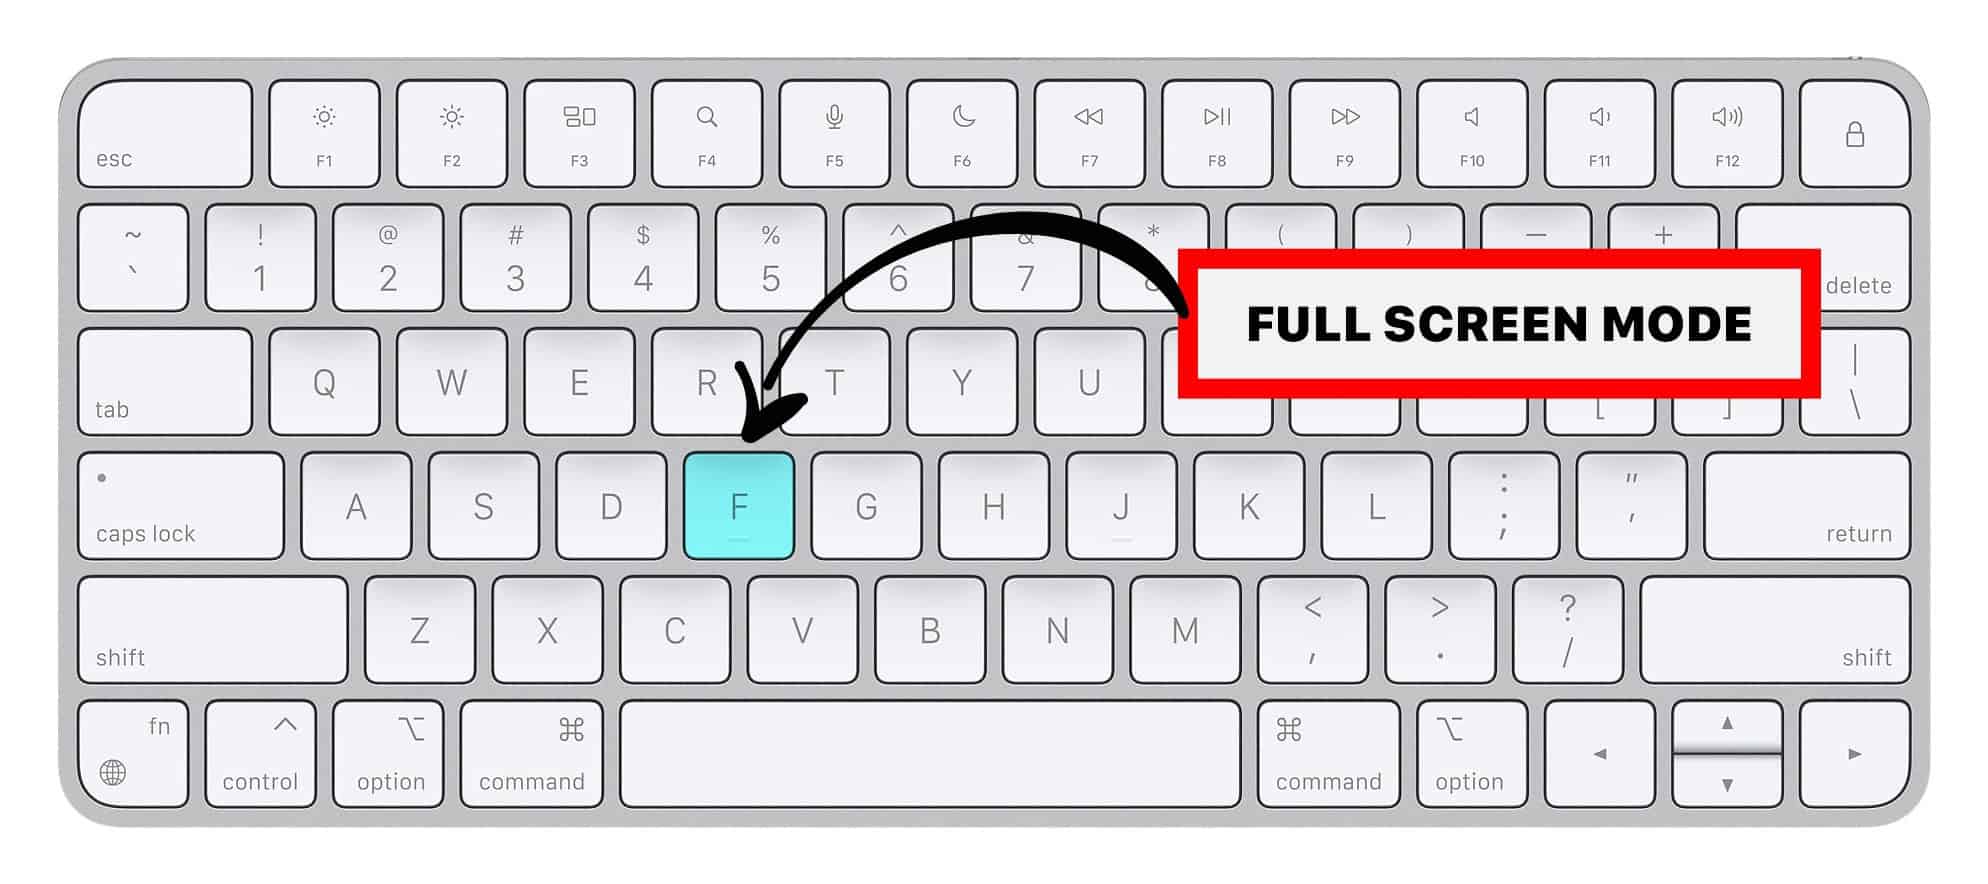
To take a screenshot, we first have to switch to full-screen mode. Since we have hidden the entire interface, we have to use hotkeys. Press F to switch to full-screen mode.
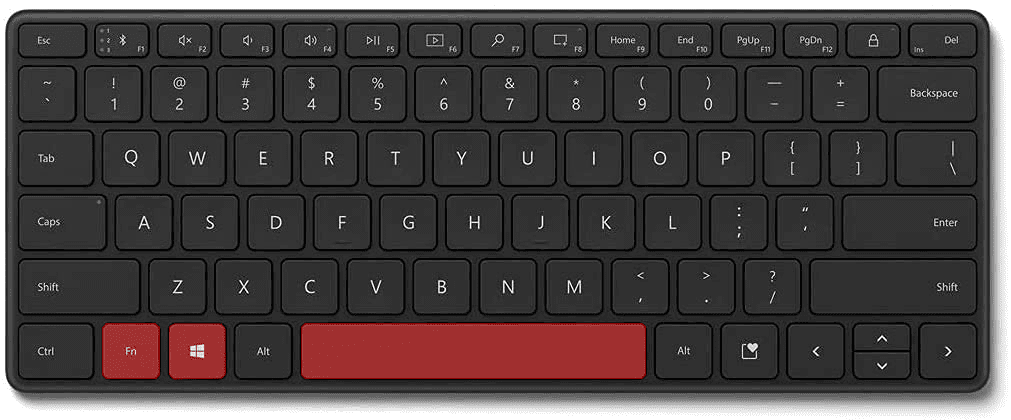
Take a screenshot on Windows
Depending on your hardware, you may use the Windows Key + PrtScn button as a shortcut for the print screen.
If your device does not have the PrtScn button, you may use Fn + Windows key + Space Bar to take a screenshot, which can then be printed.
To locate your screenshots, open File Explorer from the taskbar. Select the Pictures folder on the side navigation pane and select Screenshots.
Take a screenshot on macOS
Taking a screenshot on macOS is super easy. Just press the following three buttons to save a screenshot to your Desktop folder.
Shift + Command + 3.

How to go frame by frame with TubeBuddy
TubeBuddy Thumbnail Generator
A much easier way to go frame by frame for one of your own videos is by installing the free TubeBuddy browser extension and linking it with your YouTube account.
You then have access to the built-in Thumbnail Generator tool.
To activate it, open YouTube Studio and visit the Content tab.
Find a video of your choice and hover your mouse cursor over the video title until a little TB logo appears.
Click on it to open TubeBuddy's Quick Links menu, and select the Thumbnail Generator. This will open up a wizard that allows you to create a custom YouTube thumbnail or, in our case, to save any video frame to your hard disk.
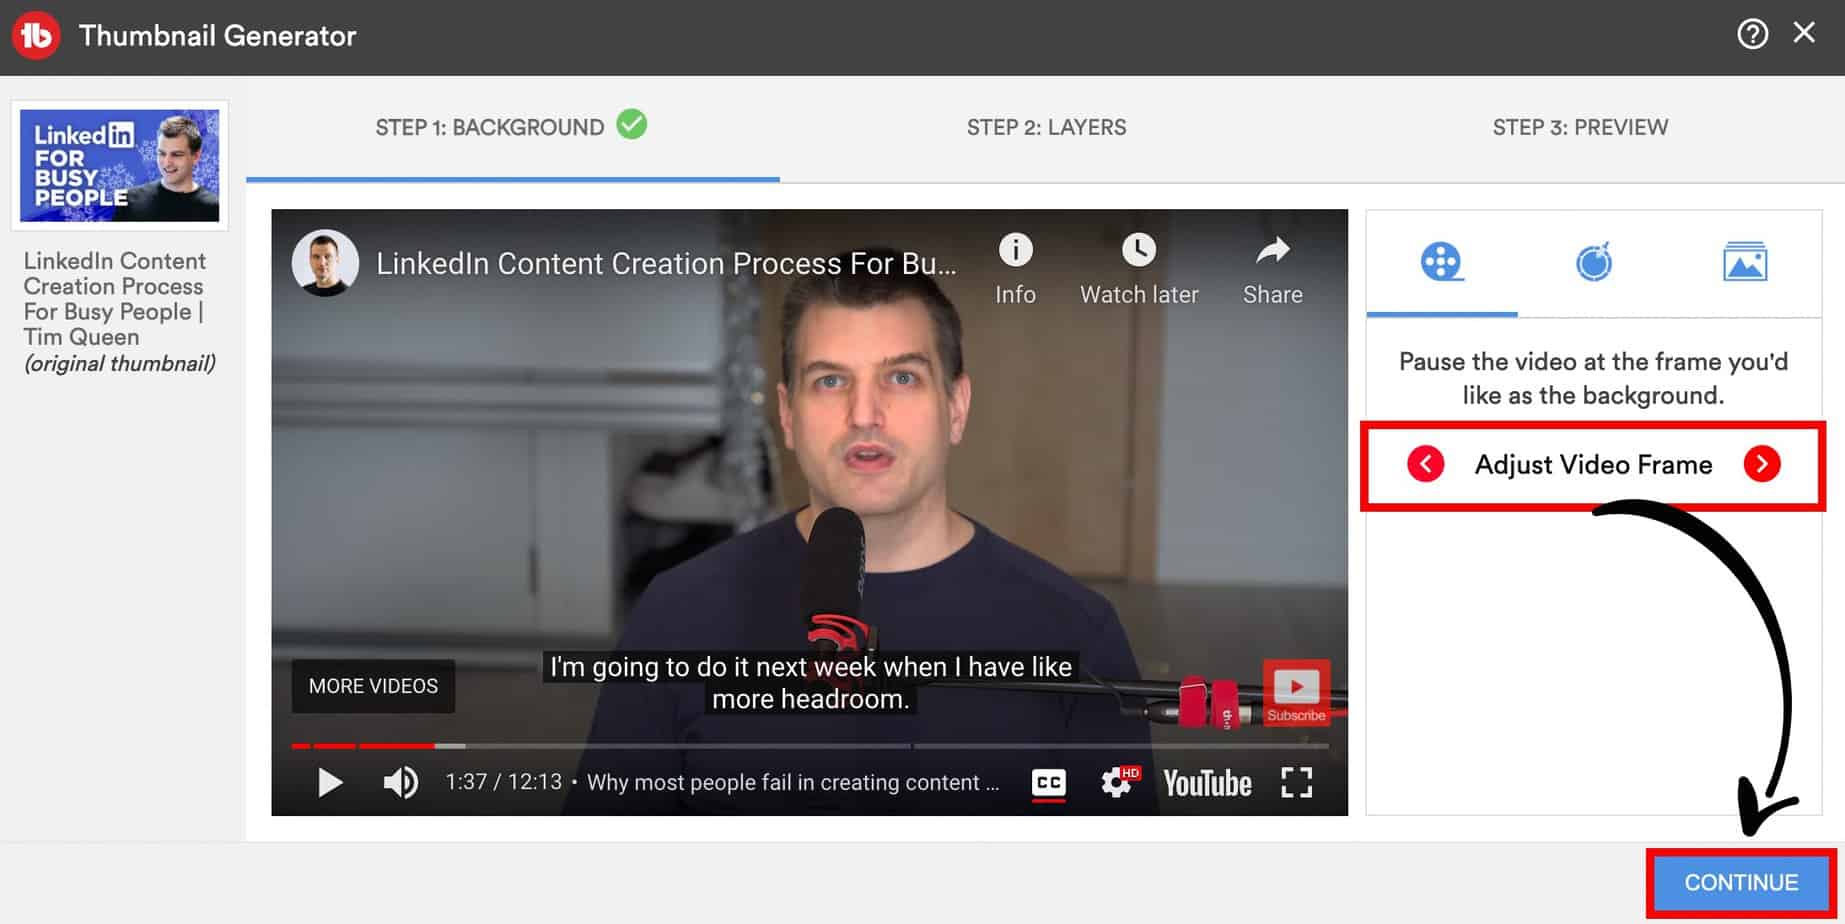
In the first dialog, pick "Still frame from video".
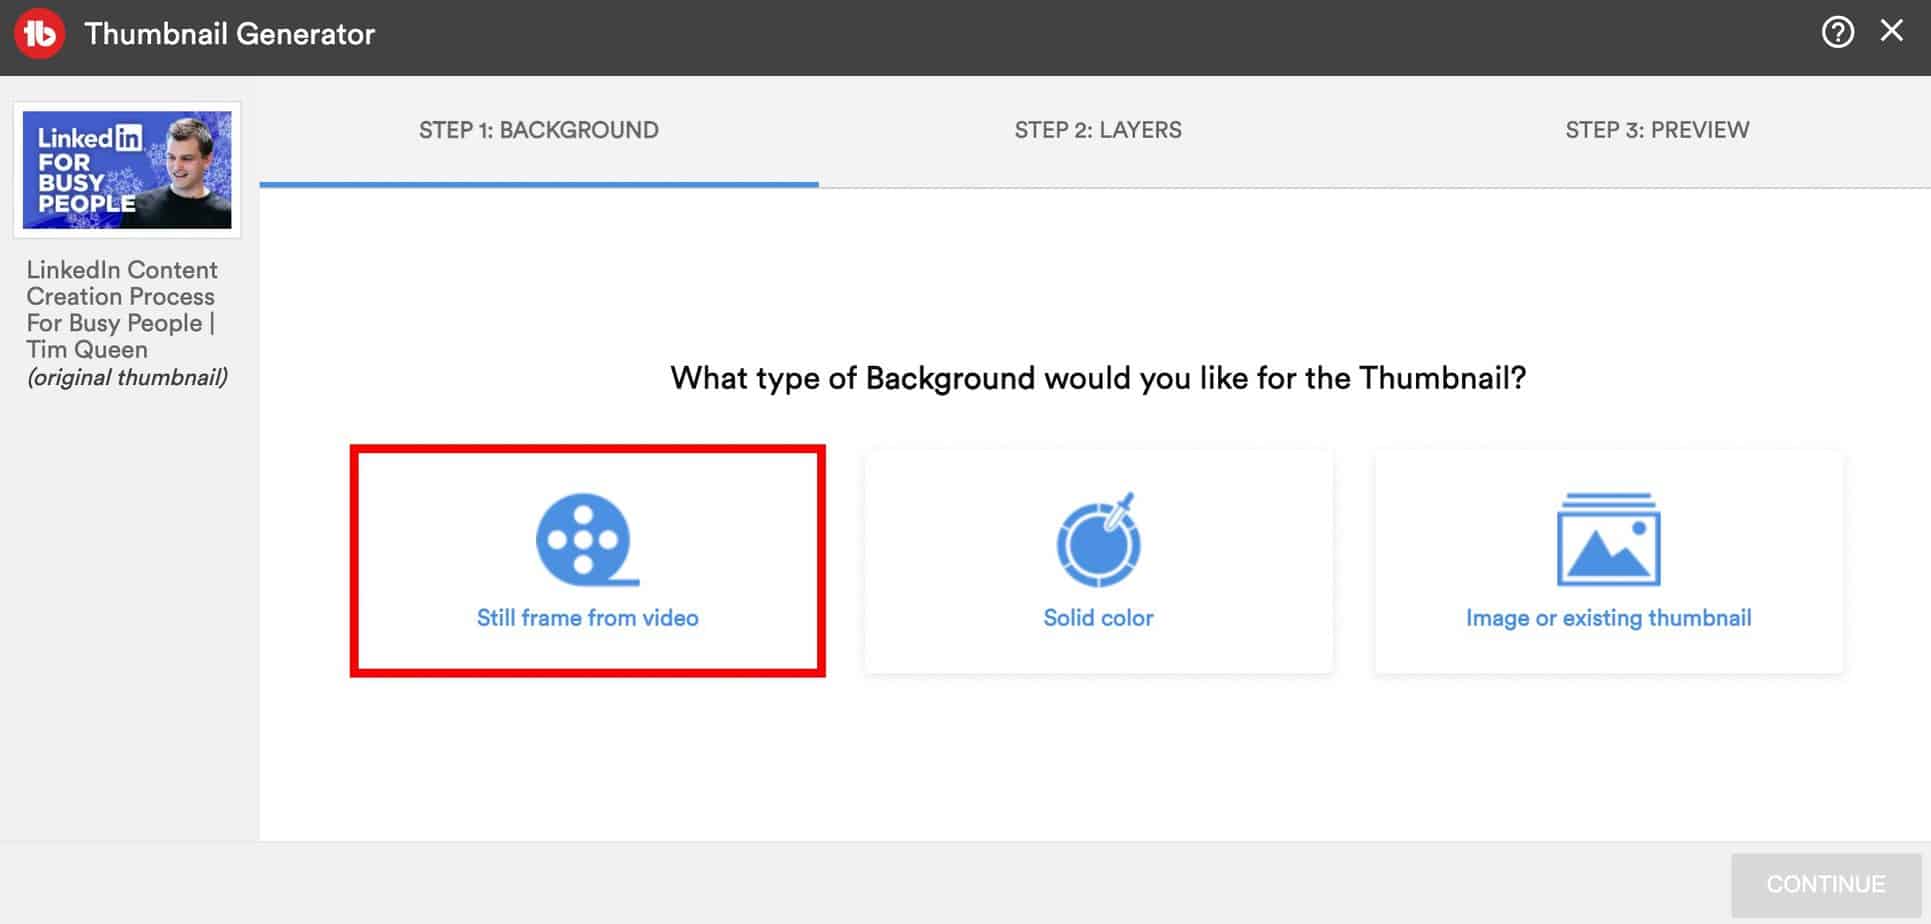
This will open up an embedded YouTube player of your video.
You now have two icons with left and right arrows that allow you to jump one frame back or forward on the right side. Use them to select a good frame, then press Continue.
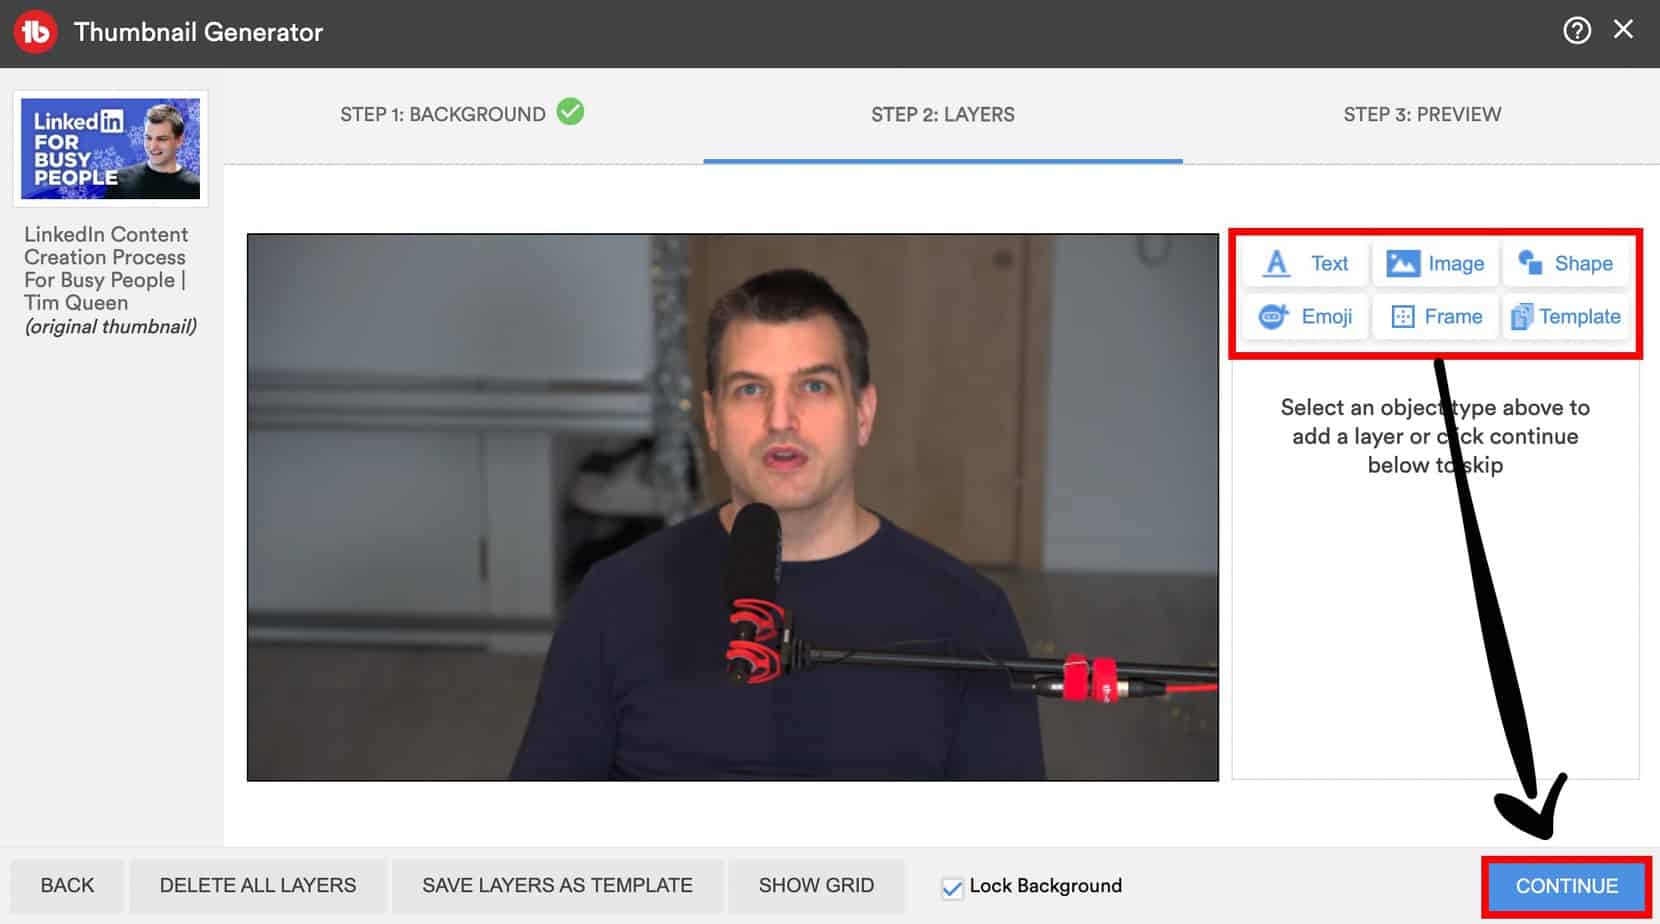
You could add overlays such as text, stickers, emojis, etc. We will skip all of this because we want to export a clean video frame. Press Continue to progress to the final page.
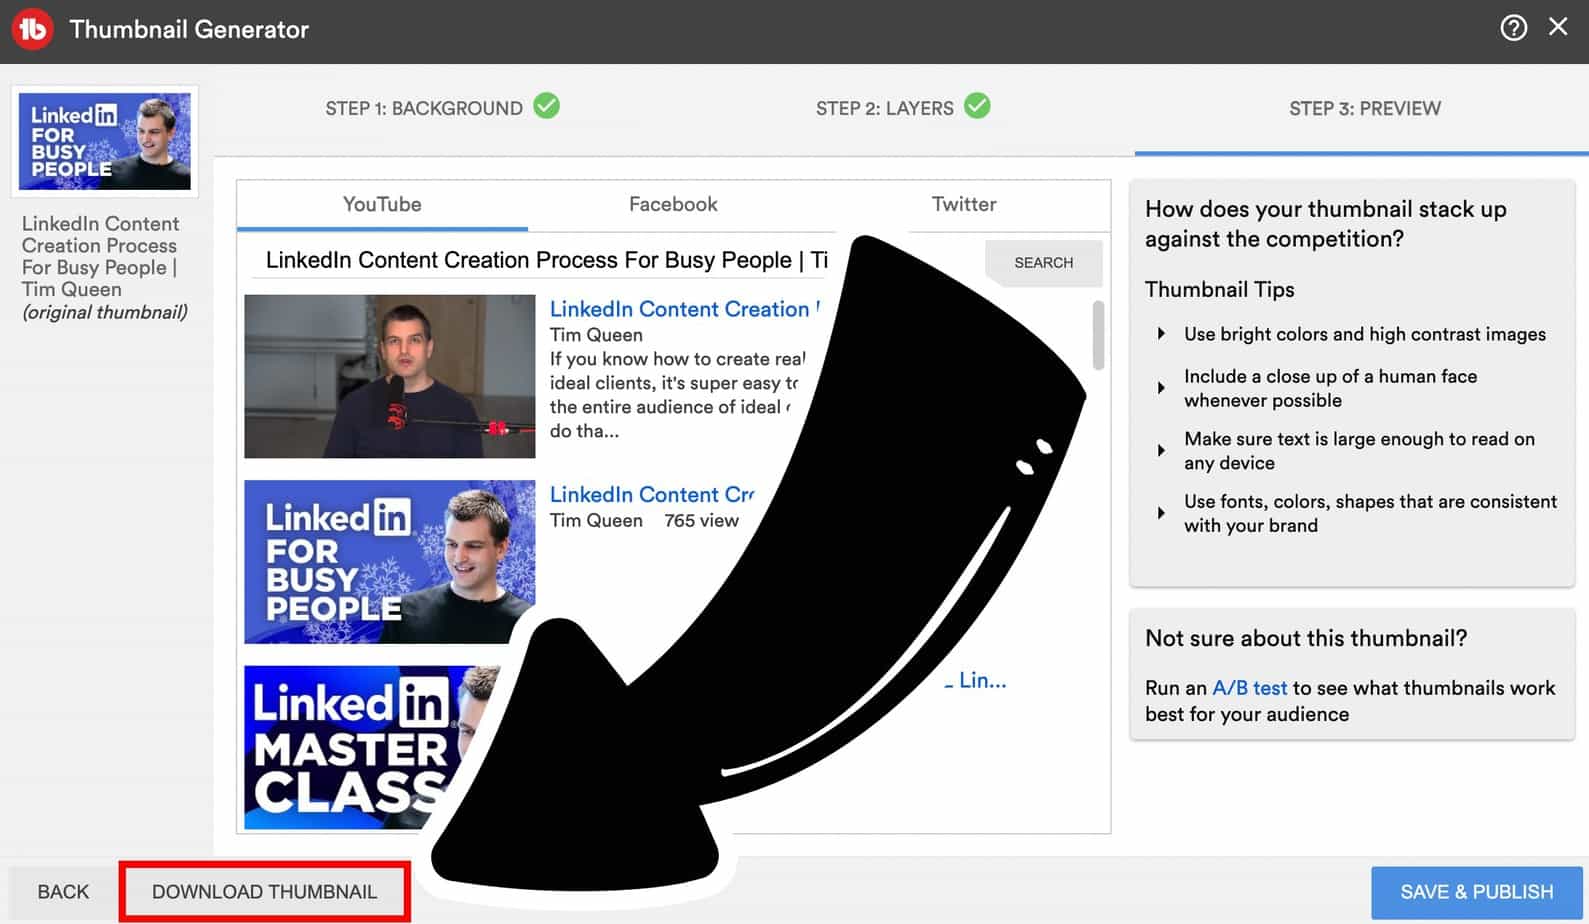
At the bottom left, click on "Download Thumbnail" to save the current frame.
Don't click on "Save & Publish" at the bottom right. This would override your custom thumbnail. Instead, click on the X icon at the top right to exit the dialog.
How to download YouTube videos
Downloading YouTube videos with VLC
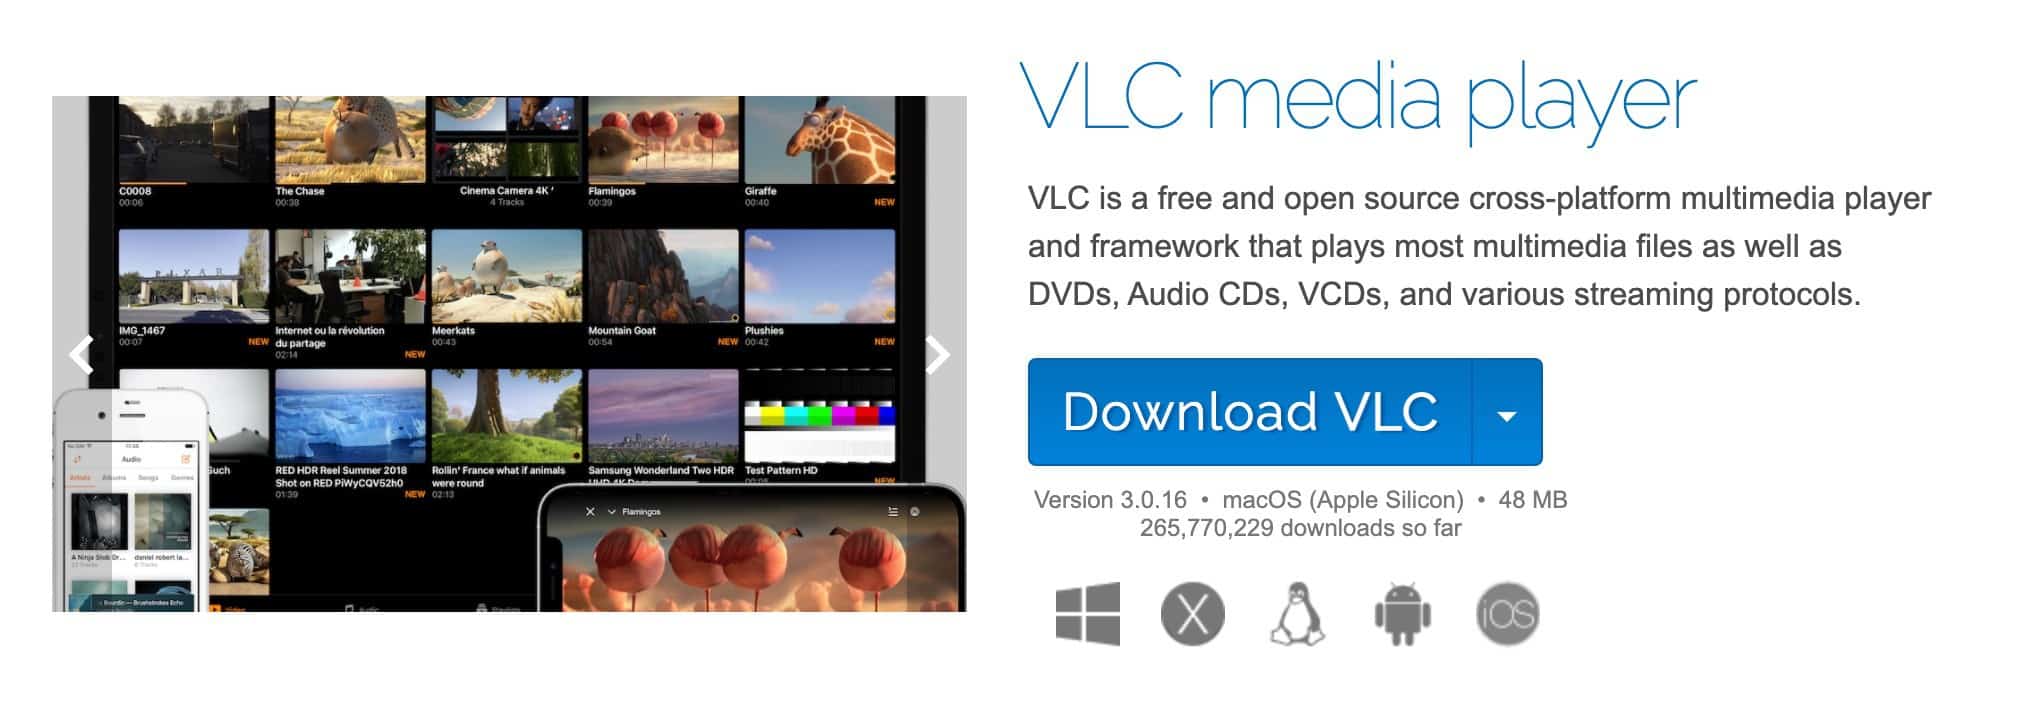
Download the free VLC Media Player app on your computer. It has Windows, macOS, and Linux versions.
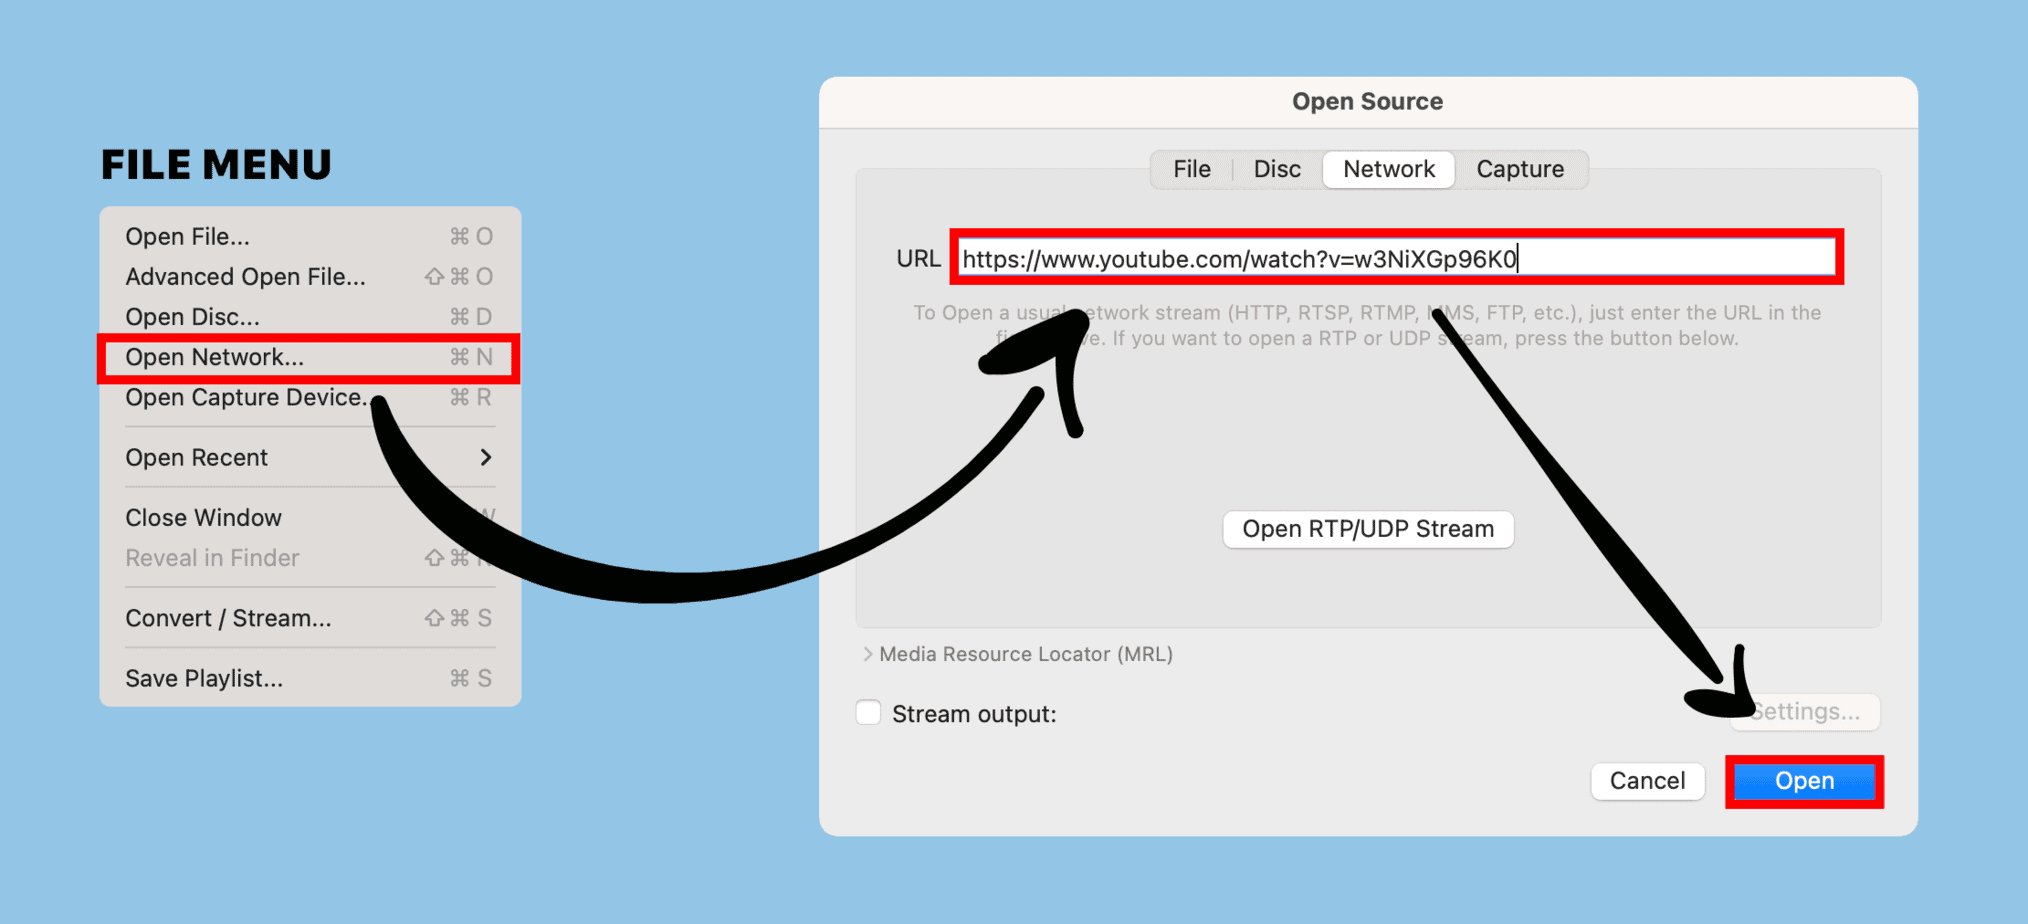
Start VLC and select Open Network from the File menu. In the URL field, copy and paste your YouTube video URL. Once you're done, click on Open. Within a few seconds, your YouTube video will be playable.
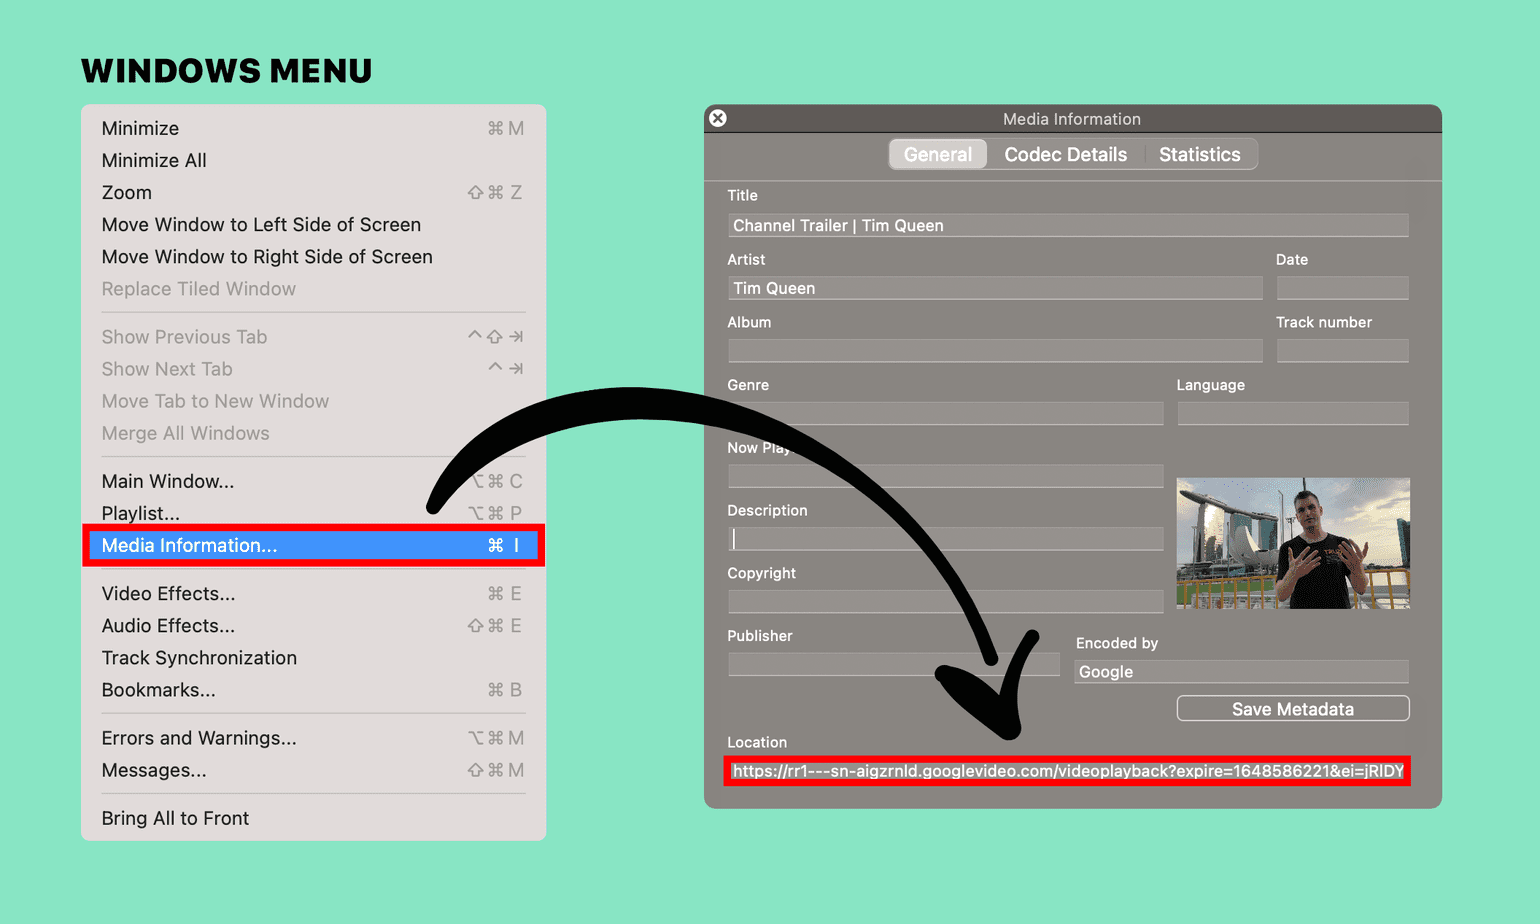
From the "Windows" menu, click on "Media Information".
Find the Location field at the bottom and copy the URL.
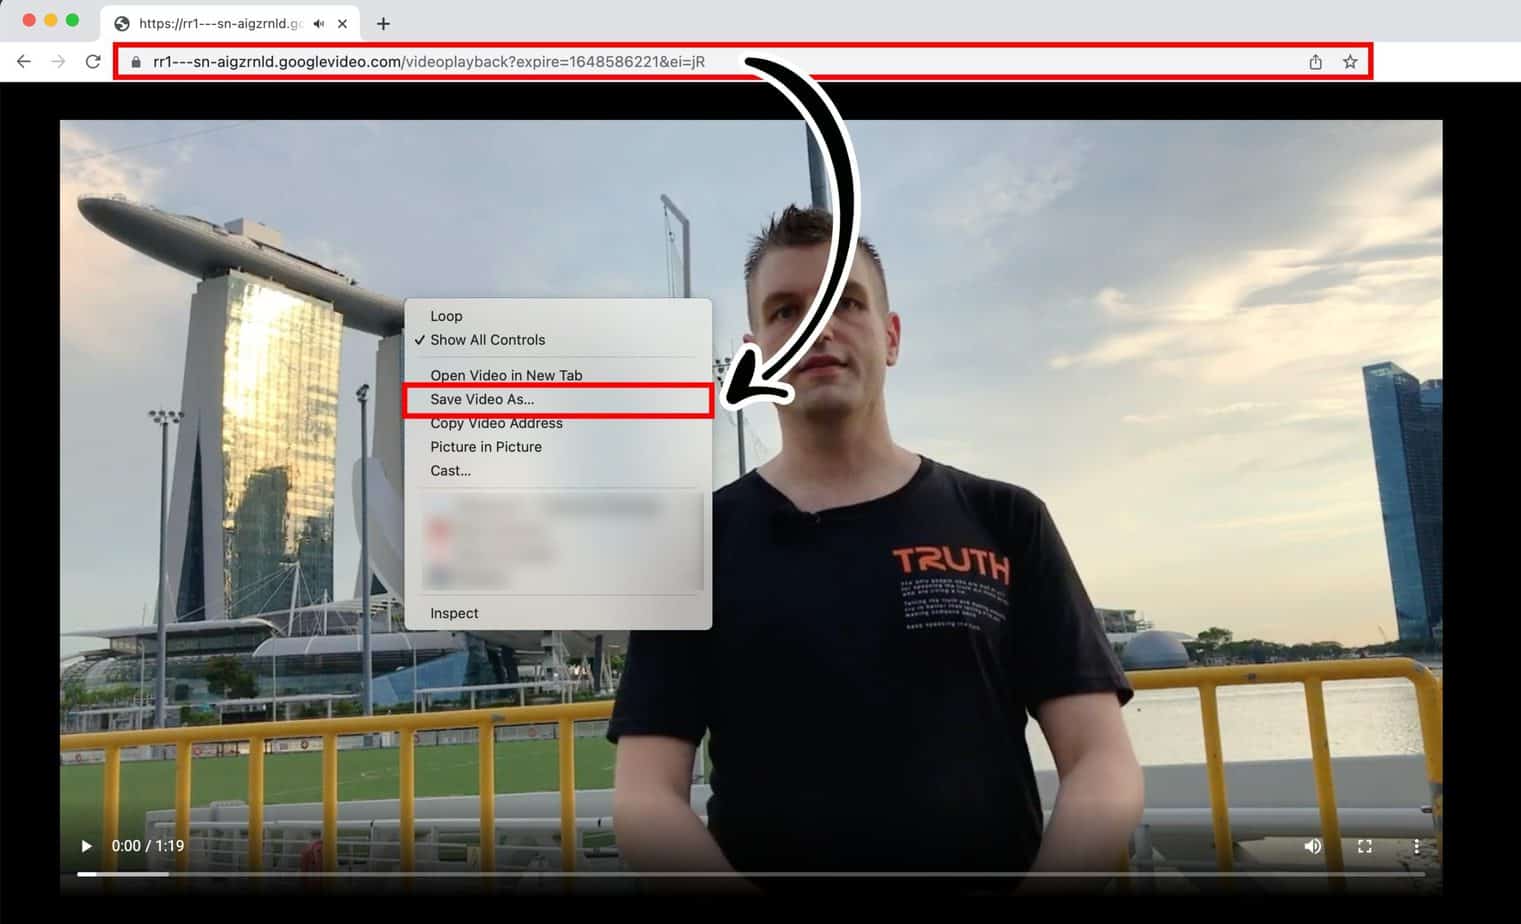
Paste the URL into your web browser's address bar.
Right-click on the video, click on "Save Video As" and download your MP4 file so that you can edit it in your favorite video editor later.
Downloading your own YouTube videos via YouTube Studio
If you want to download one of your own videos, the process is much simpler. Log into your YouTube channel and visit YouTube Studio.
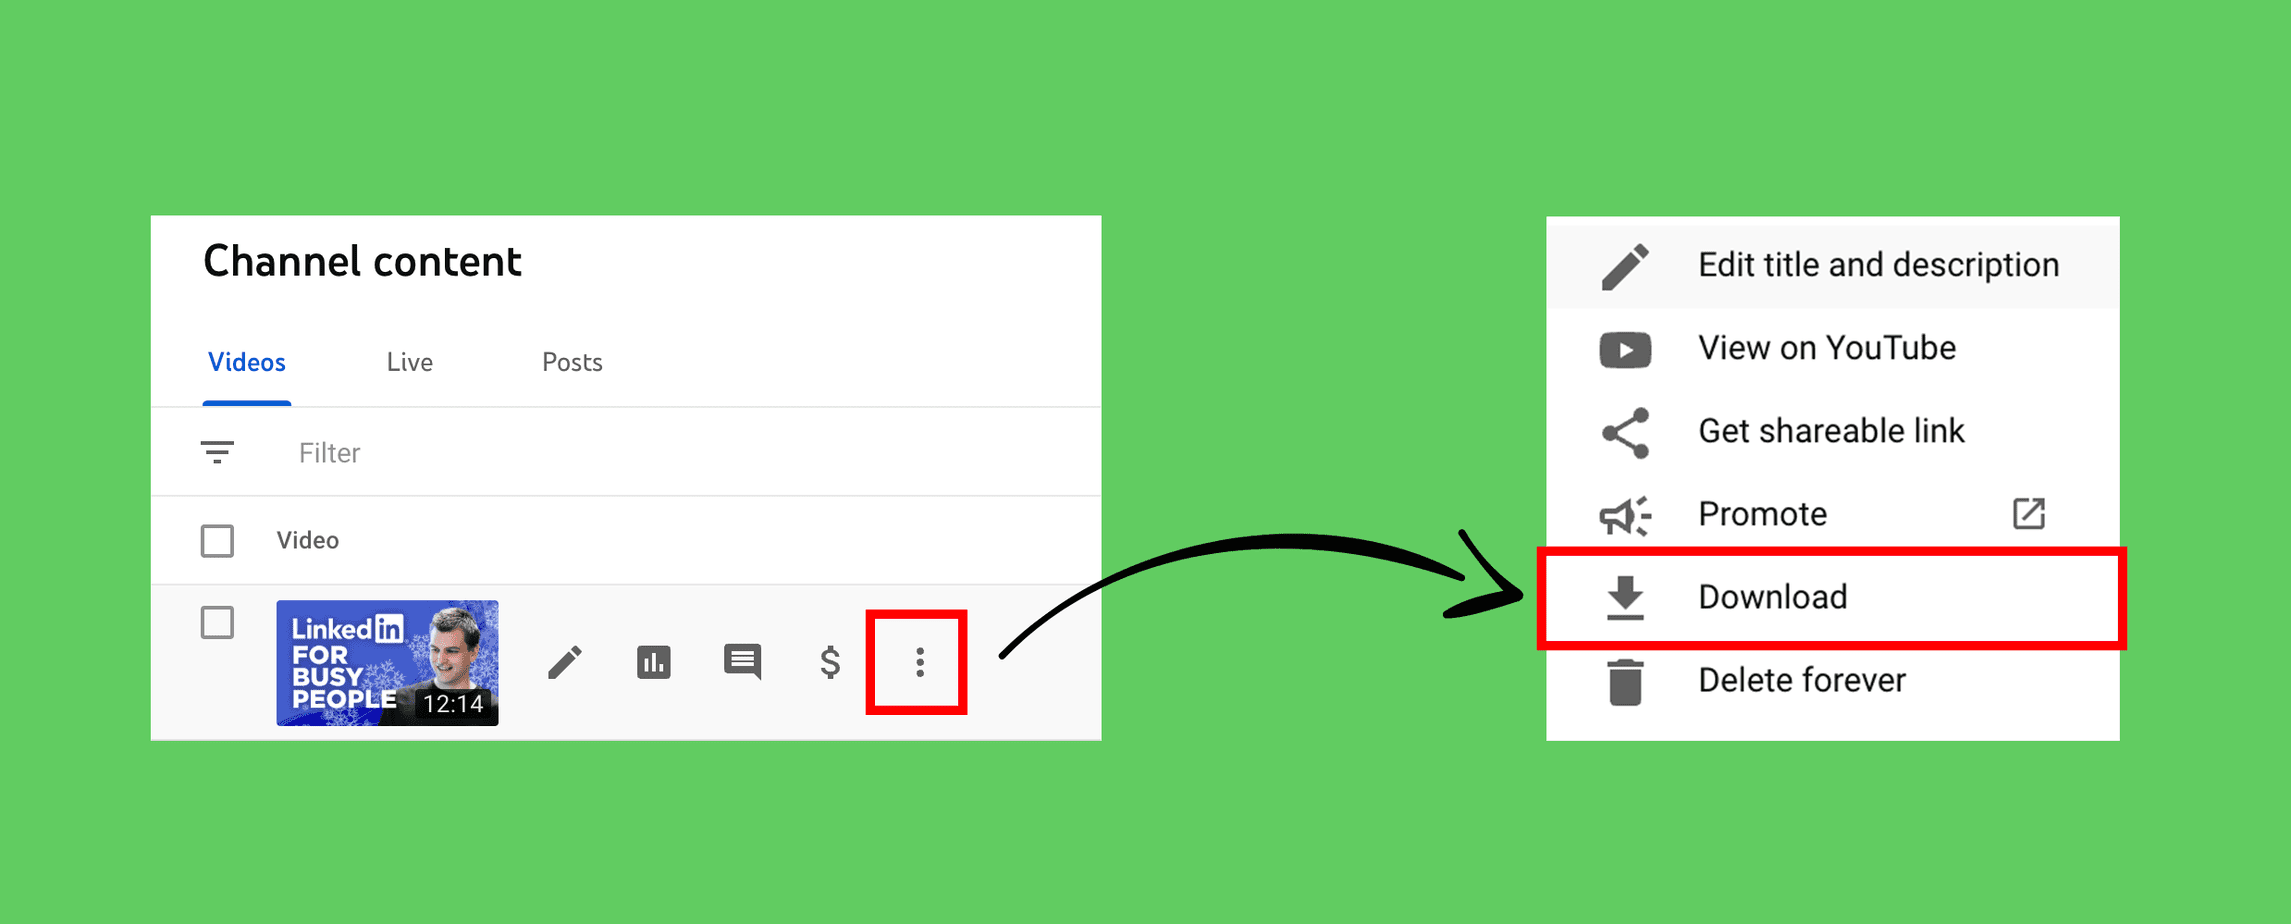
On the left sidebar, click on content. Then pick any video of your choice. Hover your mouse over the video title, and click on the three-dot ︙ icon.
From the menu, select Download. You have an MP4 video file on your local hard disk within a few seconds.
How to go frame by frame on your computer
Frame by frame with VLC Media Player
If you haven't already done so earlier, download the free VLC Media Player.
Open VLC and select "Open Network" from the File menu.
In the URL field, add your YouTube video URL. Then click on Open.
You can use the playback bar to jump between different video sections.
VLC only can jump ahead one frame forward, but not backward. You have to place your video playhead slightly before your desired frame as you're only able to forward.
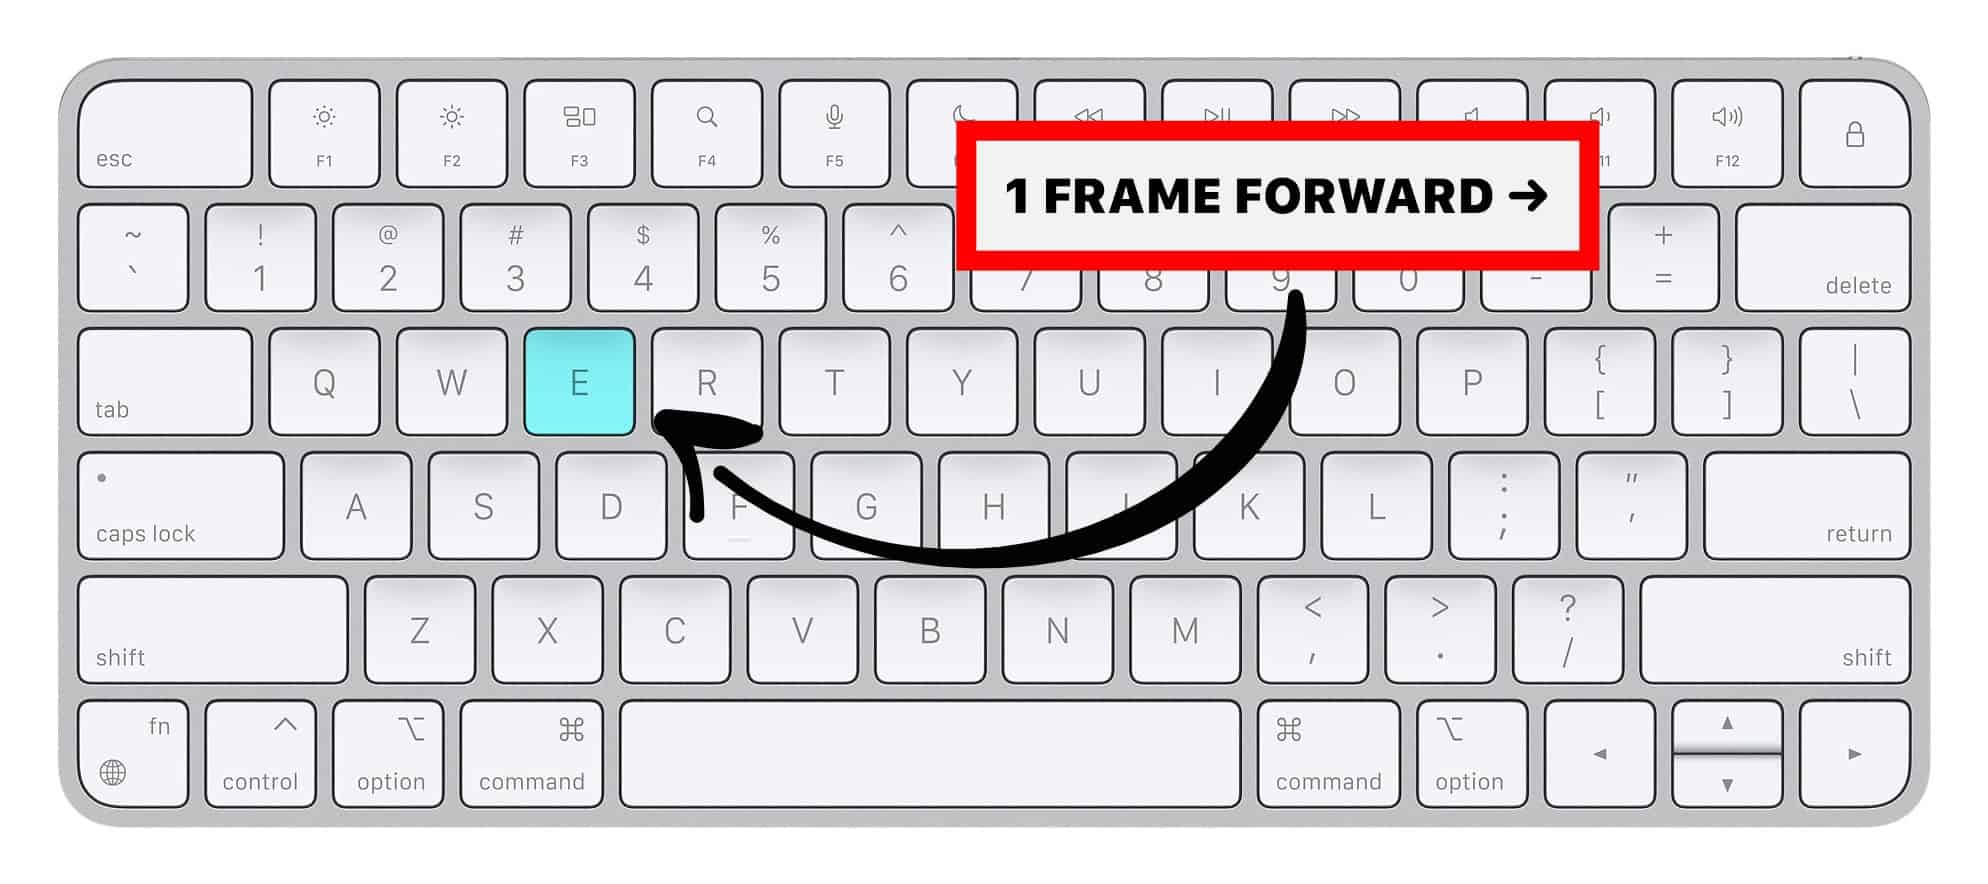
Press the E key to jump ahead one frame at a time. Be as slow as possible as you get close to your desired frame. Otherwise, you might have to go back a few seconds and start over.
Remember each second typically contains between 24 and 60 video frames. Each frame requires on click on the E key.
Once you have found the perfect frame, open the Video menu and click on Snapshot.
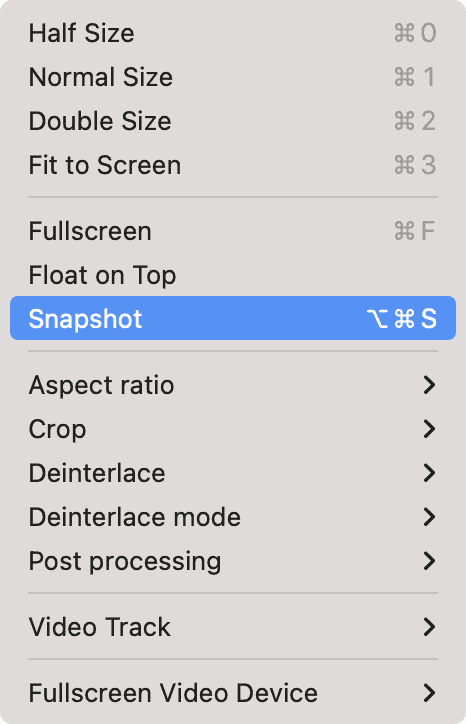
Congratulations, your current frame has been saved as a PNG file to your computer!
Frame by frame with Final Cut Pro X
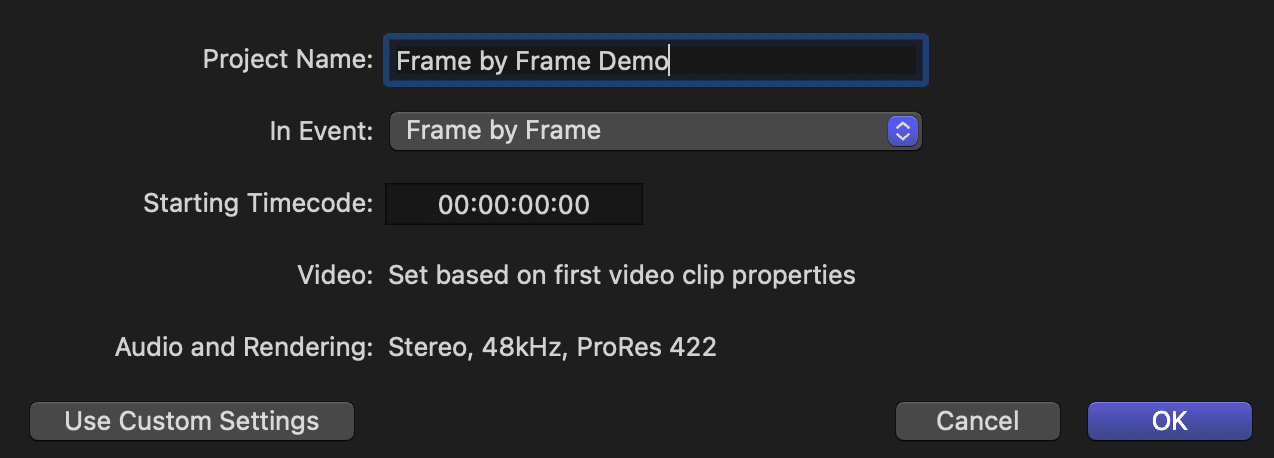
Create a new video project. Select "Automatic Settings" so that Final Cut Pro X will use the resolution and framerate of the first video you're adding to your timeline.
Drag and drop your downloaded MP4 file into the timeline.
Click anywhere in the timeline, then use the left and right arrow keys to move the playhead frame by frame.
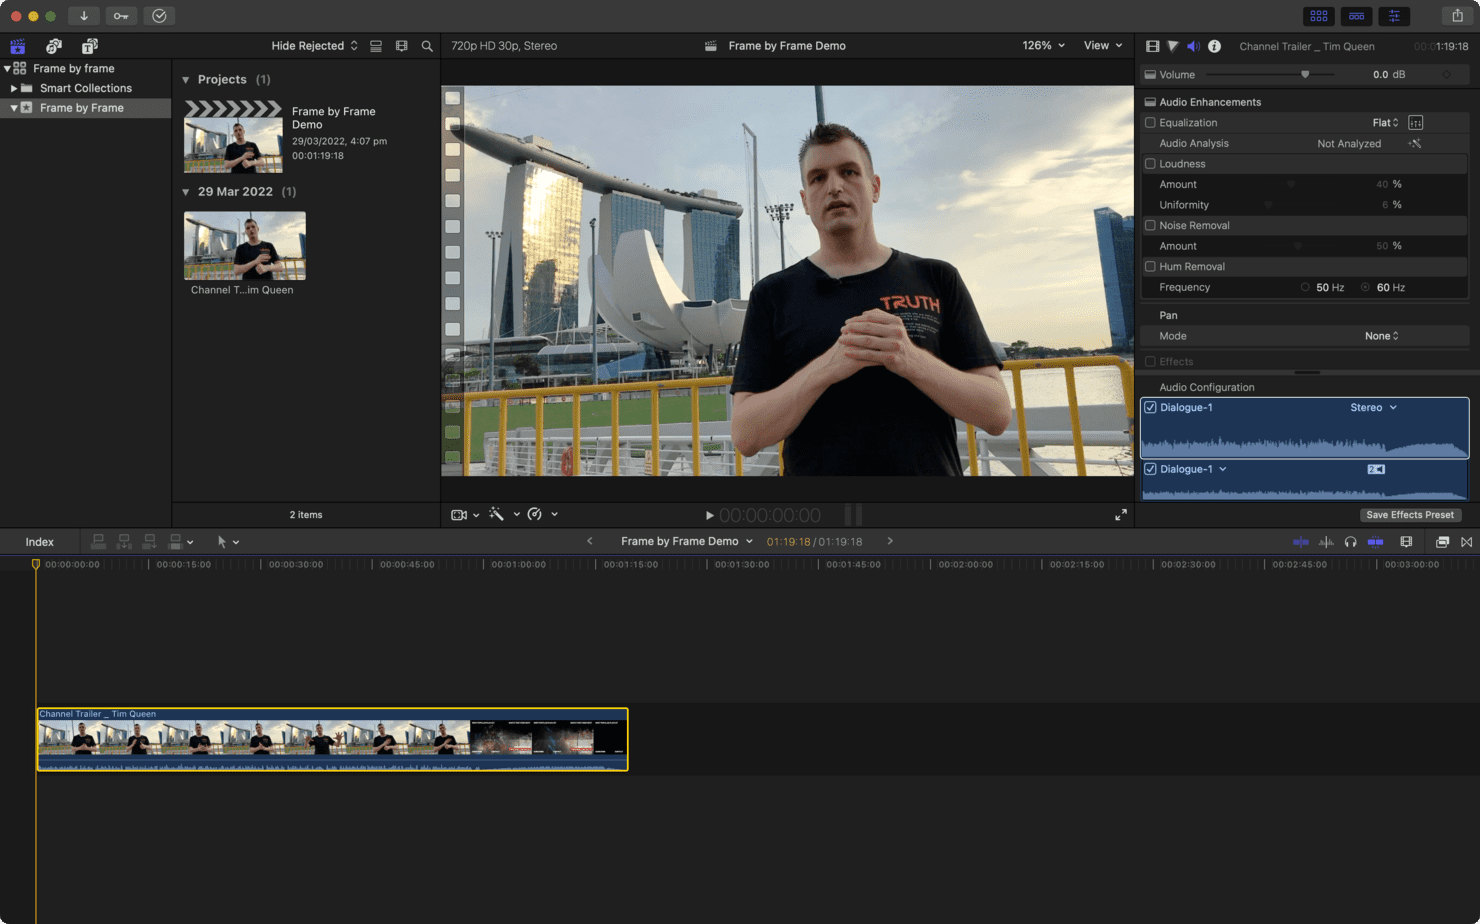
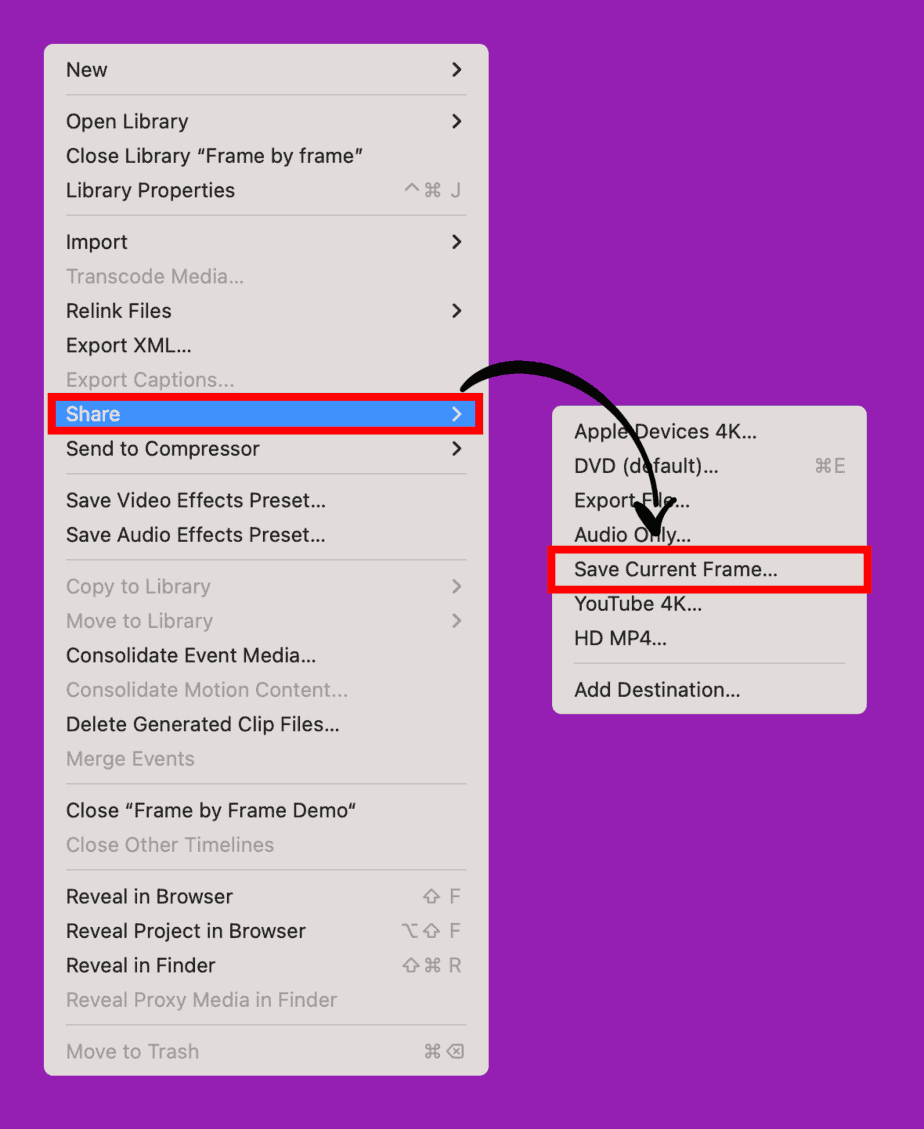
Once you have found an exciting frame that you want to export, open the File menu, select Share, and then Save Current Frame.
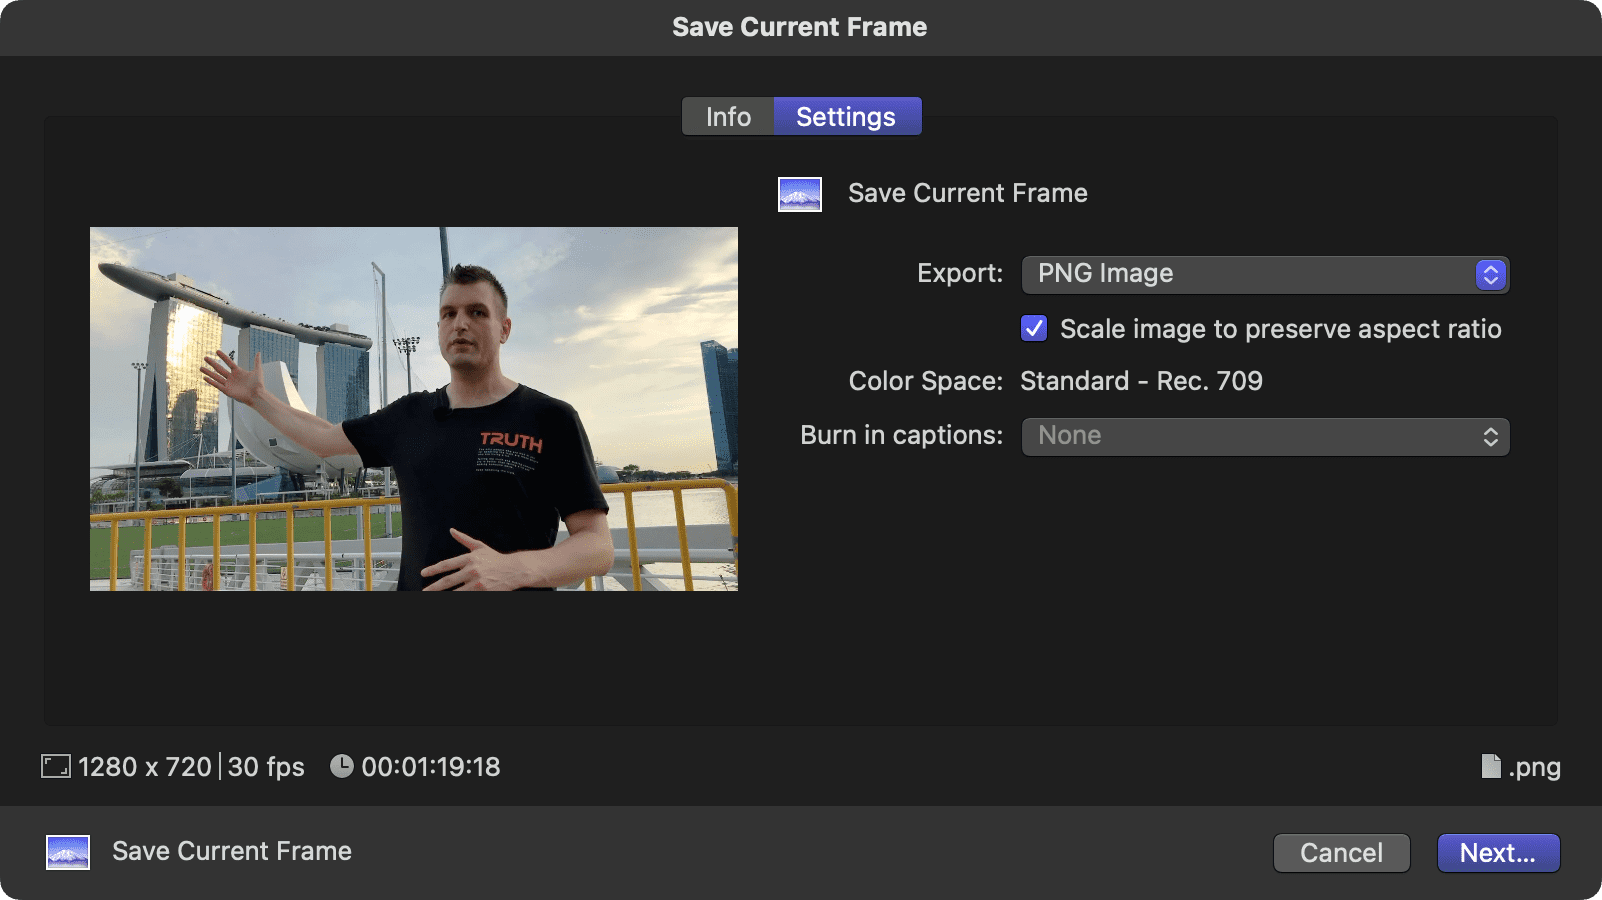
Select either PNG or JPEG as the image format on the settings panel. Click Next to save your selected frame to your hard disk.
Adobe Premiere Pro
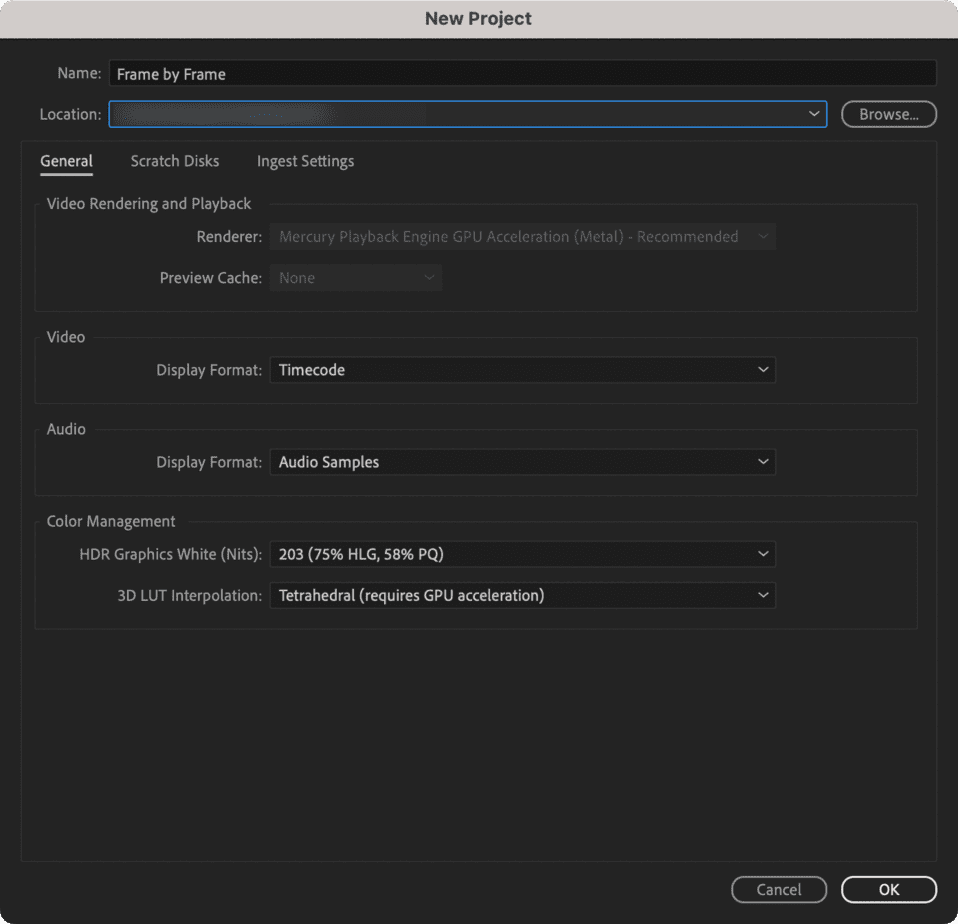
Create a new video project with the default settings in Adobe Premiere Pro.
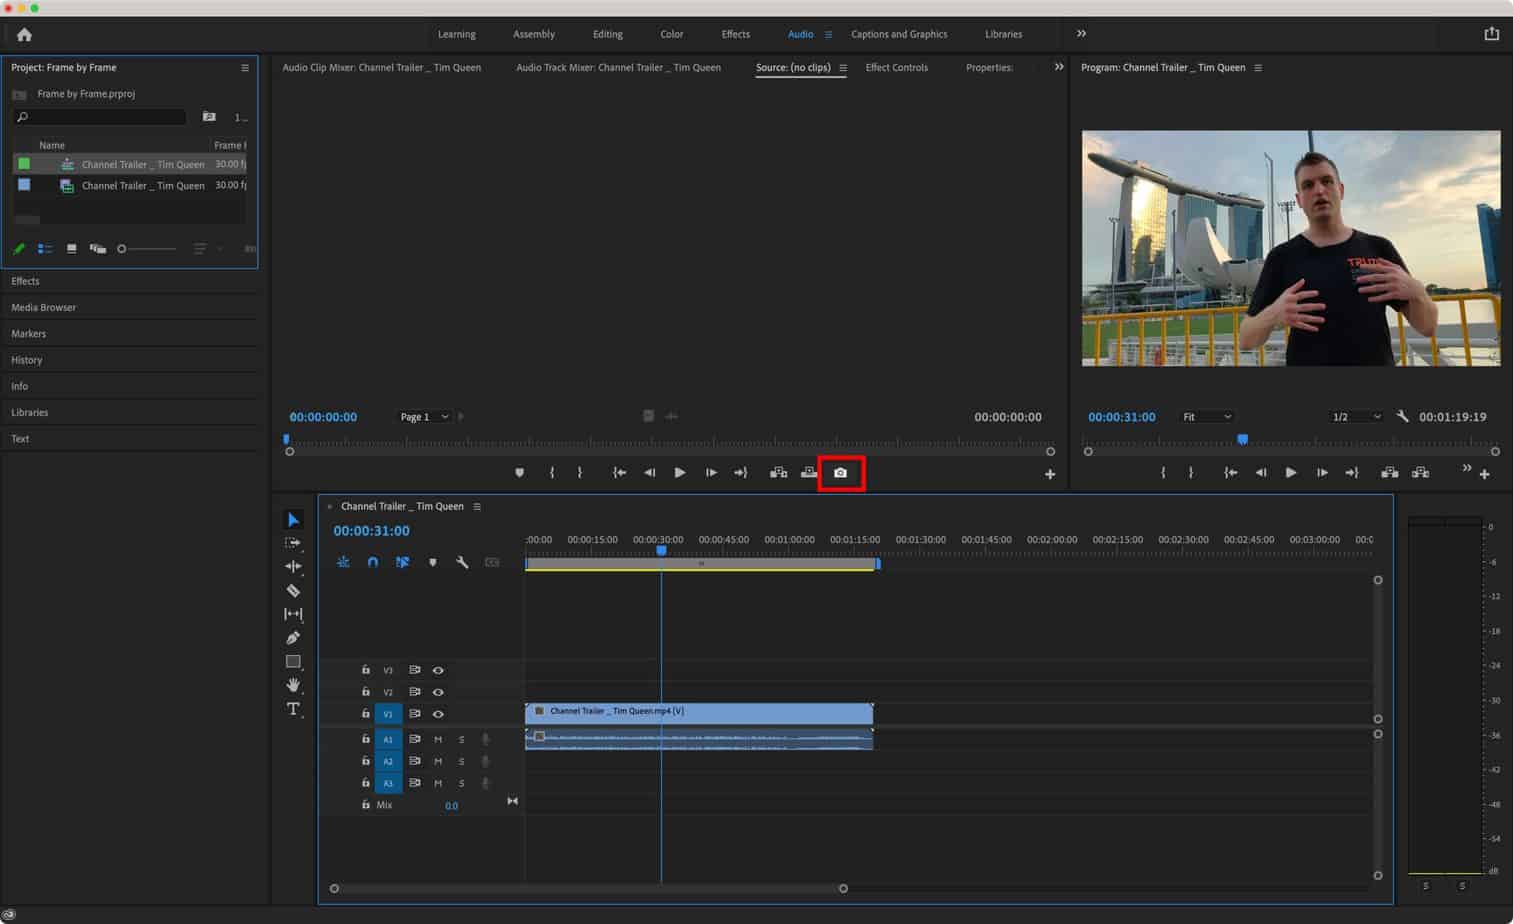
Drag and drop your MP4 file into the timeline. Click anywhere in the timeline, then use the left and right arrow keys to move the playhead frame by frame.
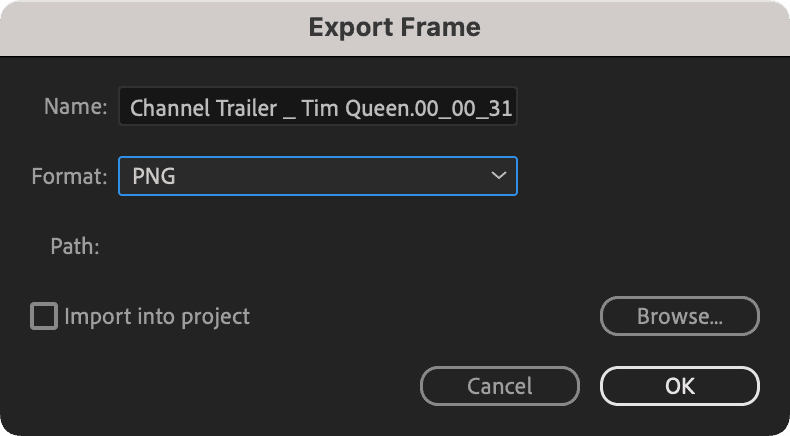
Find the camera icon below your video preview window and click it once you have found an interesting frame that you want to export.
In the "Export" dialog, select PNG or JPEG as the file format. Then press Ok to save your frame.
How to create a killer YouTube thumbnail for your next video
Now that you have found and downloaded the perfect YouTube frame, it's time to make an awesome-looking thumbnail for your video.
To learn the best practices, I want you first to read my article on how to design great YouTube thumbnails that get clicks.
Ok, great! Now that you know what you want to design, here are my top recommendations for apps and services to get your YouTube thumbnail designed in no time.
- TubeBuddy Thumbnail Generator. Built-in within the TubeBuddy YouTube growth tool. Read my full TubeBuddy review here. Then sign up for a free TubeBuddy account here.
- Canva. Web-based design app ideal for beginners. The paid version is just $10 per month and has incredible features such as baked-in background removal. Sign up for Canva here.
- Adobe Photoshop. The best-in-class solution. Period. If you want to start a professional YouTube channel, I highly recommend signing up for the Adobe Creative Cloud. It has tools for anything imaginable. Photoshop for video thumbnails. Premiere Pro for video editing. After Effects for special effects and transitions. 20+ apps in total. Sign up for Adobe Creative Cloud here.
- Fiverr. My go-to website to find affordable professionals for anything video. Video editors, thumbnail designers, intro music composers. You name it; they have it. Sign up for a free Fiverr account here.
Conclusion
Using frame-by-frame navigation is easy if you know the right tools and how to use them.
In this article, I showed you different ways to go frame by frame, both online and offline, and explained how you could save and download individual frames for your YouTube thumbnails.
If you want to start a successful YouTube channel in 2025, I recommend you check out some of my many YouTube growth articles on my blog.
Some of my most popular articles cover how to get 4000 hours of watch time and how to get 1000 subscribers to join the YouTube Partner Program, and so much more.